- Free Dota Template
- Cinematics
- Color Codes
- Dialog Boxes
- Multiboards
- Abilities - Buffs and Spells
- Abilities - Guide
- Abilities - Introduction
- Advanced Skinning in Photoshop
- AI - Basics and Triggers
- AI - The Editor
- Start Here
- General FAQ
- Cameras
- Campaign Basics
- Elevator Switches
- Formula Finder
- Unit Editor
- Trigger Basics
- Variable Basics
- Attachments
- Creating Icons
- Custom Tiles
- Editing Skins
- Fade Filters
- Importing Models
- Loading Screen
- Minimap Image


|
|
 |
 |
|
Skins - Editing Skins with Photoshop, Part 2: The MethodTutorial By corvusHauntVersions: Part 1 - Editing Skins with Photoshop Part 2 - The Method The Method and Planning of Skin Editing In Photoshop In this tutorial, you will learn about my method to editing skins. I will providemy knowledge about how a skin works, the steps to take prior to the editing, and some more basic techniques. Materials:[/B] -An MPQ viewer and extractor -A BLP to TGA converter (Warcraft 3 Viewer and WC3 Image Extractor II have both these functions) -Photoshop -Some prior experience with the Photoshop tools First steps Opening the Skin Before editing a skin, you need to extract and convert it to an editable format. For this tutorial, open up Photoshop and break out the "HeroTaurenChieftain" skin, the same I used in my first tutorial. What you should have open is this: 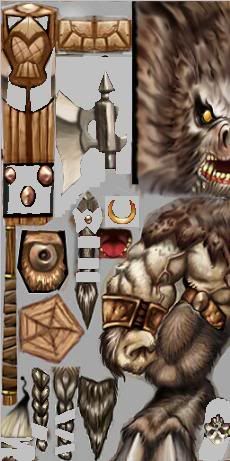 Reference Mapping To see how the skin works, you should make a reference drawing, with the skin's parts labeled. This prevents you from making a wonderfully detailed section of a skin, only to have it ruined by the sometimes horrible wrapping. It takes some extra time, but it can save you a bad headache. First, have the World Editor open, with the Terrain view hidden, and Lighting unchecked. Now place the unit you are making the skin for. Zoom in and rotate to get a good view of the unit. Compare the unit and the skin. Can you tell what everything in the skin is? Do you see how some things are stretched and wrapped? Blow the image of the skin up double-sized with the "Resize Image" option under "Help". Then, make a new layer on top of the background. Now you can start your reference map. It's nothing special, just markings and text telling you how and where everything is wrapped. Here is my example:  Blue Arrows = Marks stretching. Size and length of arrow roughly shows how far the stretch is. Green Marks = Marks areas that should not be detailed, they are not easily seen in-game. You can devolop your own symbols and markings to fit your style and make it easier for you. The Idea Now that you have your map set up, you can start thinking about what you want to do with the skin. If you just jump in without thinking about it first, the skin will lack any theme or style. You must ask yourself some questions. What do I want to accomplish by editing this model? You should know what you want to do. If you don't have an idea already, you will just sit there and stare at it trying to think something up What will be the theme? Your skin should fit the theme of the model and how the character will be used. You'll want to make it darker if it is a thief character, and lighter for a paladin. A world-saving paladin probably shouldn't have a black cape and red eyes :P What environment will the skin be used in? You'll need to think about this one. Make your skin logical. It may look cool, but a naga in a metal armor skin in an underwater map just makes no sense. Furthering the Plan After you have started devoloping more detailed and planned out ideas for the edit, you must now do a little more planning and then start following through with the plan. Optional: Idea Map If you would like to take this extra step, it can help make the actual edit effortless. But, for a simple edit that doesn't really require this step, it is more of a hassle. Your decision. To make an "Idea Map", make a new layer on top of your reference map (or start a new one if you didn't make a reference map). Then just roughly mark in what you are going to add. This can further organize the edit. Here is my Idea Map for the "Pimpin' Tauren":  (Thank you WhiteSock for pointing the typo out!) You must keep in mind what will look good, and keep peeking at the Reference Map to see what will work with the wrapping, and what is worth more time making detailed. Starting the Edit As you start the edit, you need to think about how you are going to go about completing each detail. What tools will you use? What kind of shortcuts can you take advantage of? You will want to make a nice skin, but at the same time, you don't want to spend too much time on it either. Some Techniques and Tools Here is a list of tools and techniques that are used often when editing skins. This is not a complete list, it only includes the tools that I use most often when editing. Tools The Lasso Tool: An extremely useful tool used to section off certain peices of an image. This allows you to apply filters, and brushes to only that part of the image. The Brush Tool: Your basic tool to apply color to a part of the image. After, you can apply "Blending Modes" to reach different effects and styles. The Eraser Tool: A self explanatory tool, used to remove parts of an image. Simple, yet at times very useful. The Move Tool: Also a simple and self explanatory tool, it is used to move parts of an image. It only moves the selected layer, and will move one certain part of the layer if it is selected with the Marquee or Lasso tools. 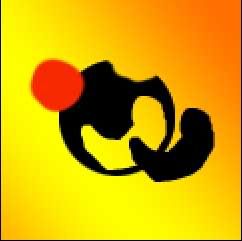 This image shows examples of each Adjustments Hue and Saturation: A control menu accessed by going to Image >> Adjustments >> Hue/Saturation. Here you can edit the selected layer or area by using the sliders to change the Hue, Saturation and Brightness. Useful to change color and tint without overriding the existing texture. 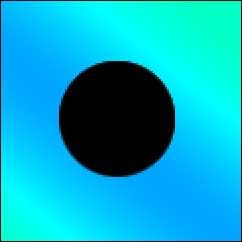 This image is the same, only with the hue adjusted Shadow and Highlight: Accessed by going to Image >> Adjustments >> Shadow/Highlight. Here you can really edit the Brightness and Highlight of the image. This is a good way to lighten up a layer that you might have made a little too dark, or vice versa. Invert: Inverts your colors to their opposite. Can add a spooky or warped looking effect to the skin. Accessed by going to Image >> Adjustments >>Invert  Here it shows the inversion Filters These can be extremely useful. Blur: A nice little tool that can soften an area, or add an effect. For example, Motion Blur will add a look of movement to the selected area. 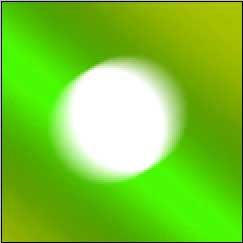 The same image after a Motion Blur on the dot Distort: A less often used effect that can add some interesting looks to the image.  Still the same image, but now the background has a "Glass" distortion, and the dot has the texture type "Texture" applied Texture: A very nice group of filters that can be used to easily add a good looking effect. For example, Mosaic or Craquelure can make part of your image look more ancient or worn.  _________________________________________________________________ Well, I hope you like my second tutorial, and I hope by sharing my techniques you have learned alot about Skin editing. The next installment will be the actual editing (I know most of you who looked at this tutorial will probably be dissapointed that you didn't really do any real editing :P). If you liked this tutorial or have any suggestions or changes for me to make, please leave a comment and I will do what I can :D Also, if you don't mind, I would like to see any skins that this tutorial helped/inspired you to make. That would make me very happy :) Thanks to Smith_s9 and WhiteSock for pointing some typos out. Click here to comment on this tutorial. |
||
 |
 |
| Designed by Arkheno
2005 Blizzard Entertainment® Blizzard Entertainment is a trademark or registered trademark of Blizzard Entertainment, Inc. in the U.S. and/or other countries. All rights reserved. |

Team Griffonrawl Trains Muay Thai and MMA fighters in Ohio.
Apex Steel Pipe - Buys and sells Steel Pipe.