| |
Cinematics Tutorial
By XXconanXXX
Introduction
Welcome to the world of cinematography! In this tutorial, you will learn how to manipulate various aspects of the vast
cinematic world, including the manipulation of cameras, units, and doodads.
The beginnings of a cinematic
First, we need to start off on setting the cinematic. The cinematic can have multiple events, depending on your needs, such
as applying a cinematic when a unit enters a specific area of the map, or at the beginning and/or the ending of the map.
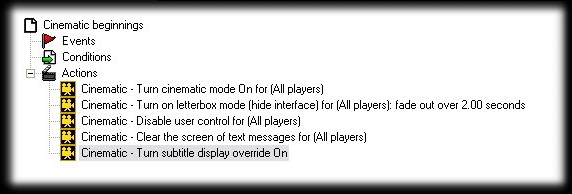
To get into cinematic mode, we first need to add a few actions that will allow us to display messages, disabling in-game
fogs, and so on.
We first need to use the action "Cinematic - Turn cinematic mode On for (Your and/or All Players)". This will disable Fog
of War and The Black Mask, and also will disable the user control.
We also want to use an action "Cinematic - Turn on letterbox mode (hide interface) for (Your and/or All Players): fade out over 2.00 seconds".
We also want to use the action, "Cinematic - Disable user control for (Your and/or All Players)" removes all units from
the selection of the player, removing the normal circle under the units when you select them. This will also ensure that
when the cinematic is over, they won't have their previously selected units selected.
You might also want to use the action "Cinematic - Clear the screen of text messages for (Your and/or All Players)",
this will clear the screen of all text messages that have been displayed by the action
"Game - Display to (All players) the text: Text" and by players alike. We might also want to use the action
"Cinematic - Turn subtitle display override On", this will forcefully turn subtitles on for all players even if they have
it turned off.
Creating and manipulating cameras
For any good cinematic, we need to use custom cameras and camera movement to create a nice effect and show perspective in
your cinematic. We first need to set up a new camera. We can do this by accessing the Camera Pallete under
Layer>Camera Pallete. Then, in the main World Editor window, hold the CTRL button and right click the screen. Now,
while holding that down, move the mouse around. This will adjust the angle of the camera but keep it on a certain point.
You can also hold the SHIFT button + right mouse button to move the camera in and out. Now, when you have the camera setup
the way you want it, hit the 'Create Camera' button in the Camera Pallete. You can keep manipulating the camera in the main
World Editor window, and while you have the camera you want to manipulate selected, hitting the 'Set Camera to Current View'.
You can also view what a camera will look like in-game by selecting the camera and hitting the 'View Selected Camera'
button in the Camera Pallete.
When we want to apply the camera in a trigger after we've turned the cinematic on, we would use the action
"Camera - Apply <Your Camera> for <Your and/or All Players> over 3.00 seconds". This will apply the camera over however
many seconds, switching the view from your previous one to the next one. As a side-note, when using multiple cameras,
you may choose to switch cameras without panning (which gives you an option in the action). Also, when switching between
multiple cameras, when you add however many seconds you want it to pan from, the actions will wait until the camera is
fully set, and then move onto the other actions.
Unit movements, transmissions, etc.
Now we will move onto the movements and transmissions from units. When in letterbox mode, you can use the action
"Cinematic - Transmission From Unit" to show a portrait (depending on the unit's model file) and show some text on the
bottom portion of the screen. If you are not in letterbox mode when you send the transmission, the unit's portrait will
pop up where a unit's usual portrait is.
We can move units in various ways, the easiest by ordering the unit to move to a region. We can accomplish this by using
the "Unit - Order unit issue targeting a point". There, you can order the unit to move to a region or the position of a
unit and order it to attack-move, or just move. We can also use the
"Unit - Issue order targeting a point with Polar Offset" to move the unit, specifying exactly how far and at what angle.
The offset is how far the unit will move, and degrees is at what angle, with 0 being East.
Fade filters and Advanced Fade Filters
Fade filters and advanced fade filters are pictures that pop up on the screen, usually used to separate different sections in cinematics.
We can use Standard Fade filters by using the action "Cinematic - Fade filter". You can set how long it is in effect, and
how much of the map you can see (settings it's transparency anything above 0% will allow the player to see "behind" the
filter and see the game). You can use custom fade filters or the already created ones, black and white being the most common
in cinematics. Using advanced filters will give you more options, and consider looking into it if you don't find what you
want with the normal filters.
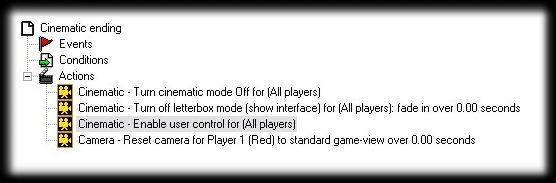
Ending the cinematic
When we end the cinematic, we need to do the exact opposite of what we did in the beginning of the cinematic. We will need
to enable user control, reset the game camera, and turn off cinematic/letterbox mode.
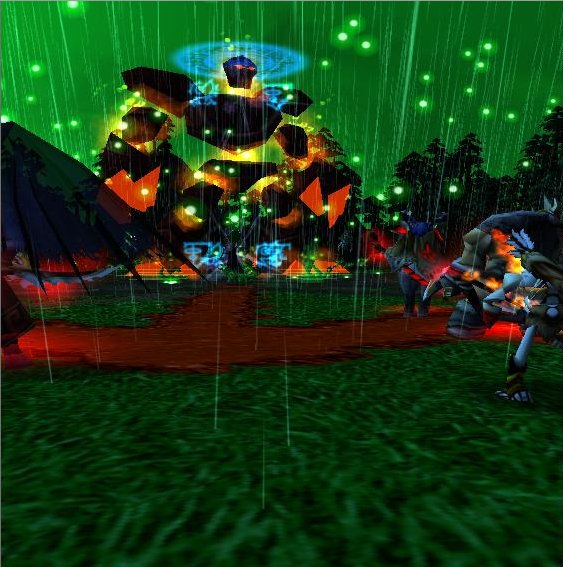
The manipulation of Special effects
With any cinematic, special effects are a necessity. For veteran and newbie cinematographers alike, the best way to
become acquainted with the hundreds of Warcraft III special effects is to take a unit or a doodad, and keep changing it's
model file through all the various ability, buff, and doodad models.
To attach a special effect to a unit, we would use the action "Special Effect - Create Special Effect on unit". This will
attach the special effect to a unit, moving the special effect along with the unit. Check the 'Attachments' tutorial on how
to attach items to units, and the different attachment points.
We can also make doodads float in water and in the air. We can go to the Object Editor under the Doodads section and under
your Doodad, check the option "Object Floats?". This will make your doodad sway gently when it's in water, ONLY in water.
Making objects float in the air is a little different, as they don't actually "float" by swaying in the air. We can move
them into the air by placing your doodad or special effect, and holding ctrl and hitting the Page UP or Page Down button.
Tips of the trade
Here are a few tips in making your cinematic even better.
- We can also set spacebar points, which will pan the camera to a specific portion of the map when a player is the
Spacebar button, but will be overridden by your other cinematic actions when you move the camera.
- You can also set the sky, fog, and lighting under the 'Environment' section. This can add even more realism to your
cinematic.
- You can create terrain deformations by looking under the 'Environment' section. You can create various deformations,
such as craters and ripples.
- You can do various things with the camera, such as shaking, swaying and setting it's camera bounds. These can be found
under the 'Camera' section.
See Also:
|
|