| |
Unwrapping UVW Textures
By SD_Ryoko
Introduction
This tutorial covers unwrapping UVW textures on Warcraft III models. This is a more advanced tutorial, and the reader
should know some basics about modelling before walking through this tutorial. For this demonstration, you will need two
tools.
UVW unwrapped textures work on percentages. For every vertex you have in your model, you will have at least one UVW vertex as
well. Since they work on percentages, you can scale the texture as much as you like - and the location will never change.
U: Horizontal position on the texture, in percentage.
V: Vertical position on the texture, in percentage.
W: Depth position. Warcraft does not use this.
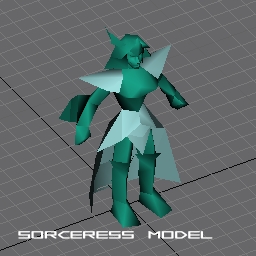 |
1. A starting model.
This is the model I have chosen for this tutorial. Its a basic sorceress, without bones, animations, or decay.
I picked these because she has a few low-polygon features, but enough of them we can work with it.
This model and the skin are included in the download file.
|
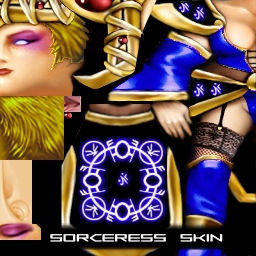 |
2. The models skin.
This is the skin we will be applying today. No, it is not the original sorceress skin. It has different colors, and some added features.
I created this custom skin a while back. Hopefully, the 'added features' will make this task a little more interesting.
This skin is a TGA file and is 256x256 pixels in size.
|
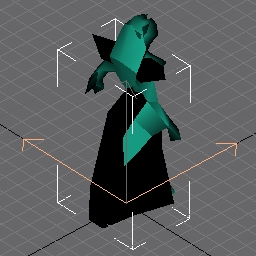 |
3. Apply the texture.
Each geoset needs a texture. Select the geoset FIRST, then drag-and-drop the texture onto the cape.
Because it is not yet unwrapped, it will appear black.
(If you don't select a geoset first, it will ask you some annoying question about backgrounds.)
|
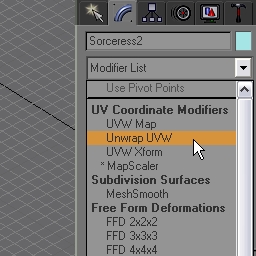 |
4. Adding the modifier.
Make sure the geoset is still selected.
On the right hand side, there is a 'Modify' tab, which I have highlighted. To add a modifier, click the
pull down box, and it will show you a list of modifiers available.
Pick 'Unwrap UVW' from the list. Yes, your geoset will change colors. The change will automatically apply.
|
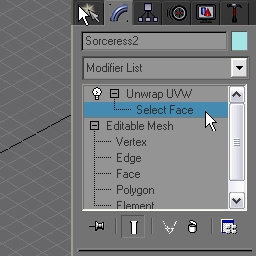 |
5. Select face tool.
You don't have to edit the sorceresses skin all at once.
The 'Select Face' tool allows you to edit the UVW of certain faces only. It is listed under your new UVW modifier.
If you do not use this tool, moving textures vertexes will effet other faces attached to it.
|
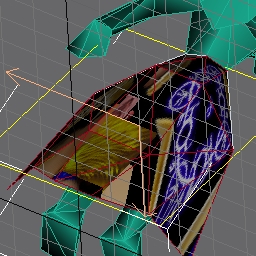 |
6. Select faces to edit.
Because the backside of her cape is different from the front, I only want to edit the backside of her cape.
Hold down the CTRL key to select multiple faces. You can also click again to unselect.
NOTE, the backside of her cape is double sided, so if you want to do it perfectly, you must rotate
her around and pick the 'front' faces as well.
|
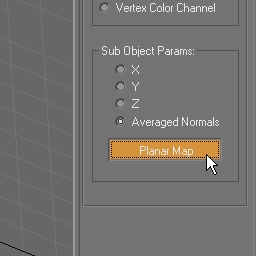 |
7. Flatten out faces on the texture.
The 'Planar Map' button flattens faces onto your texture.
X: Flattens them in the -X- plane.
Y: Flattens them in the -Y- plane.
Z: Flattens them in the -Z- plane.
Average normals will average the angle of the faces, then flatten them out. Because her cape
has several angles, this is the one I will use. You could also try the 'X' plane.
|
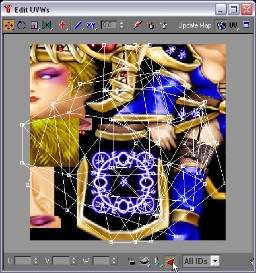 |
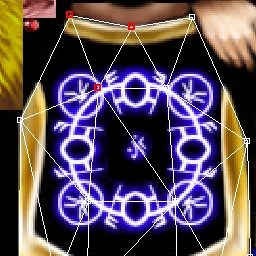
8. The UVW Editor.
Now click on 'Edit' to open up the UVW editor. Yes, its a mess. But thats because you can see
all of the vertexes in the model.
The red triangle my curser is on toggles the 'Selected Face Mask'. Click this button, and it
will only show you those faces you selected previously.
This is very handy for editing specific areas of your model!
|
 |
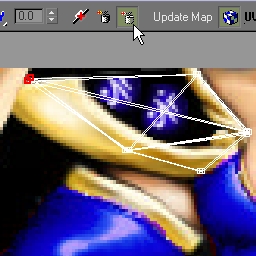
9. Placing the vertexes.
Now we can move the vertexes of her cape into place.
As you move the vertexes around the texture, you can see it update on your model. 'Window'
selecting vertexes will help you keep them together.
There are also scaling tools, mirror tools, and rotating tools. You may have to mirror or rotate the vertexes into the correct position.
If you want to key in a position, the UVW at the lower left works in percentages. This is handy when working
with cliff tiles, which are layed out in cubes.
|
 |
10. Symetrical features.
Sometimes, you'll have areas that are the same. Like the sorceress shoulders.
In this case, you can overlap the two sets of vertexes. Then, you can use
the 'Weld Selected' button to merge them together. Every time you merge vertexes together,
you have one less vertex in your MDL file. Which is good!
I tend to merge vertexes wherever possible. You can also use 'Target Weld', which welds
them automatically when turned on.
|
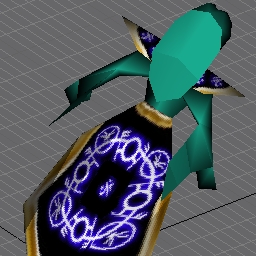 |
11. A finished geoset.
Our first unwrapped geoset! Here is what mine looks like. Remember the shoulders and the cape
were all one geoset. If you also did the front side of the cape, it should look pretty good once
you are finished.
You can always go back and click 'Edit' again to tweak and adjust how things look.
|
 |
12. The final product.
Here stands my completed sorceress, in all her glory, WITH those additional 'features'.
When you are finished, DO NOT compact your geoset. Yes, the modifier will still be in the model,
but the export scripts used for Warcraft will not export modifiers not on your list.
If you REALLY screwed up, you can delete the modifier, and start again.
|
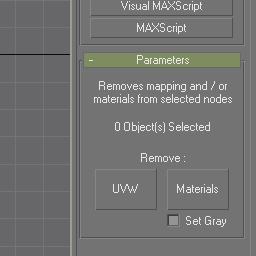 |
13. Stripping UVW.
Sometimes when you import an MDX file, it will already have UVW data inside of it.
If you would like to remove the imbedded information, GMAX has a utility to do it.
The UVW remove tool us under the 'Utilities' tab, on the right.
|
|
|