| |
Importing Models
SD_Ryoko
New custom models can be imported into Warcraft for units, doodads, effects and any other kind of spell or ability.
You do not need any special tools to download and import models. People do have a lot of problems importing models,
so I have added a trouble shooting section below. Hopefully, walking through this tutorial will assist you.
The first step is to find and download a model you like. There are a lot of models on the internet with problems,
so it can be difficult getting them to import correctly. Typically, the site that you downloaded the model from should
have ALL information you need to import it. If they don't give you a list of files and where they should go, it
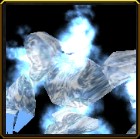
might not be worth downloading. I have chosen the model shown below, an Ice Infernal.
 |
- Model File
- IceInfernal.mdx
- Portrait File
- IceInfernal_portrait.mdx
- Skin 1
- units\IceInfernal\IceInfernal.blp
|
The website I downloaded it from shows me that it needs three files. The first is the model file. The main 3D file for
the unit. The second, is a portrait file. Models that do not have portrait files will not show speech at the bottom of the
screen. I am fortunate this model is not only cool, but very complete. Lastly, there is one skin file. Models can sometimes
have many skin files. Skins are the textures that wrap around models. Every skin file needs to have a path in front of it. If
it does not have a path, assume it will have NO path inside the import manager. Mine is showing that the full skin path
needs to be units\IceInfernal\IceInfernal.blp. If I don't import that correctly, it WILL NOT work.
- The main model file is the acutal 3D model of the unit, doodad, or effect.
- If a model has no portrait file, it will not show speech at the bottom of the screen.
- You must know where to put all the skins for the model.
Most models come in a zip file that you will need to unzip. Now a days, windows XP will unzip it for you. I am going
to unzip all my files into a folder, so they stay organized.
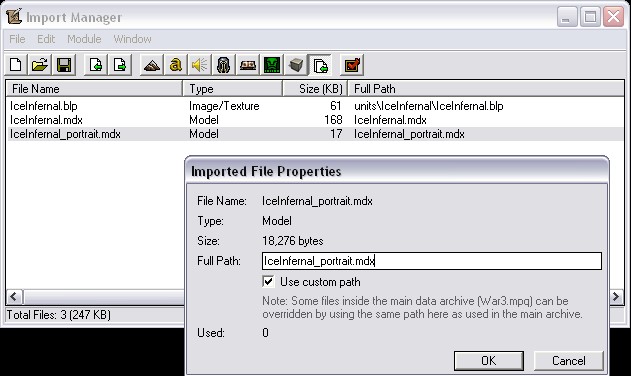
Now we need to load the import manager inside World Editor. Click on File, Import and import all the files that
came inside the zip file. If you put them in a seperate directory, you can import the entire directory easily.
For each file, you must double click them in the Import Manager, and change the custom path. Model files do not need
to be in any type of path, so I will delete the 'war3mapImported' before the file name. For skins, we need to change the
custom path to exactly what was listed on the website. In most cases, the names are case sensitive. Again, if the
custom path of the skin is not correct, it WILL NOT work.
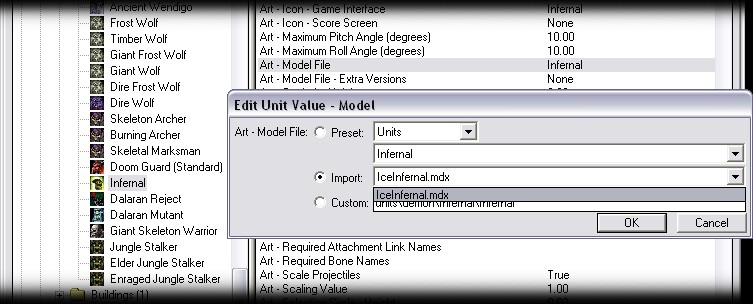
I am finished importing all of my files, so now I can assign my new model to a unit. For all practical purposes, I will
start by creating a custom unit from the standard Infernal. Load the object editor and create a unit you would like to use
with your model. You don't have to change much here. Scroll down to the field that says Art - Model File and double
click it. Check the radio button that says Imported and select your model file.
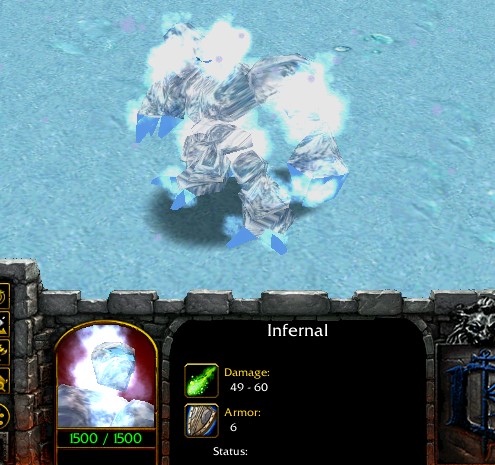
Now you can select the unit, place one in your map, and test it. If it does not work, you did something wrong. Either the
skin is missing, corrupt or in the wrong path. If that happens, see the problems I have written out below. When I test
my map, my new Infernal looks like this. Way cool.
People often wonder, why their model does not appear inside World Editor (Darg taught me this one a while back). If you copy all
of your model files into the Warcraft root directory, you can view your model inside World Editor. In this example, I would
copy the three files to D:\Warcraft III. After copying over your files, you will probobly need to restart the World
Editor to see the changes.
- My model is invisble inside the game
- This means one or more of your skins is not found. If the game cannot find the skins, your model will be invisible. Check your skin path names, and make sure all the skins you need were imported.
- My model is visible, but it has color and no skin
- This means that the skin has been altered, edited, or incorrectly created. It has lost its player color selections. The selection determines what areas will show a players' color. See Editing Skins for more information.
- Some areas appear correct, but others have a color and no skin
- Again, in this case, one of your skins is missing or has lost its player color selections. Check your paths and check that you have all the skins you need. If thats true, then one of the skins is corrupt.
- You don't know the path name for all the skins.
- Websites that supply the models should list ALL of the pathnames for the models' skins. If it does not, often times they will post the paths later, in case they forgot. Sometimes, there is a readme.txt file in the zip package, that tells you where the skins should go. If not the above, your pretty much out of luck without knowing where they go. You can open the model file with a hex editor and see where the skins are placed, but if you don't know how to do that, I do not reccomend it.
- Why don't buffs and effects work on my models?
- A lot of models are cheaply made, and were created with no attachment points. Some times, they have no ORIGIN point, so special effects will not work on them. Bummer, eh?
- When my model dies, it just stands there, and never goes away
- This means the model was made WITHOUT a death animation. Again, not everyone takes time when creating custom models. In this case, you will need a trigger to remove them from the game when they die.
- My model has no hero glow
- The model was created without hero glow. Hero glow is an integral part of the original models. There are 'Glow Packs' you can download and apply to your unit instead. Provided, they have an origin point.
|
|