|
|
 |
| |
Terraining - Volcano Island
Tutorial By Andrewgosu
Introduction
This tutorial helps you to understand terraining principals better and also make a nice looking volcano island.
Beginning
Make a new map using Sunken Ruins terrain. I will be using 64x64 in size. Mark initial water level to deep water.
Step 1 - Raising the terrain
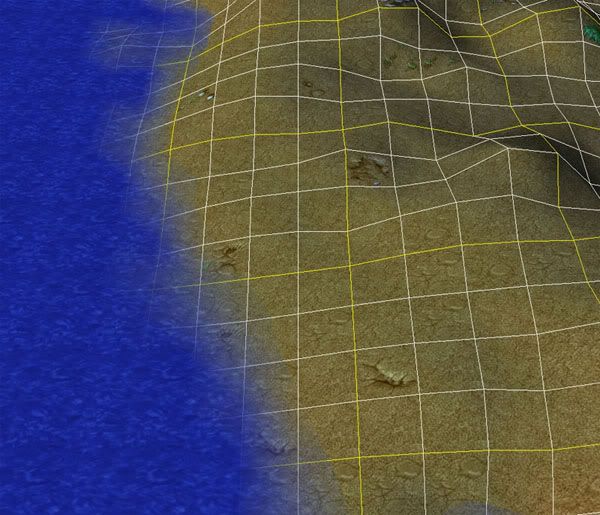
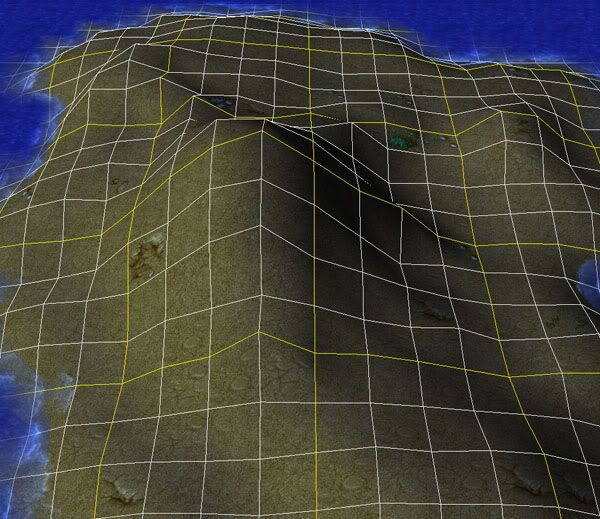
Start raising the terrain with the „Raise” tool and use a rather bigger brush size, 3 for the main part, size 1 for the edges. Try to make it an island shape. Raise to water until you see the terrain popping out of it. This effect leaves you with clean edges rather than cut and ugly.
Good terrain
Bad terrain
Step 2 – Smoothing the terrain
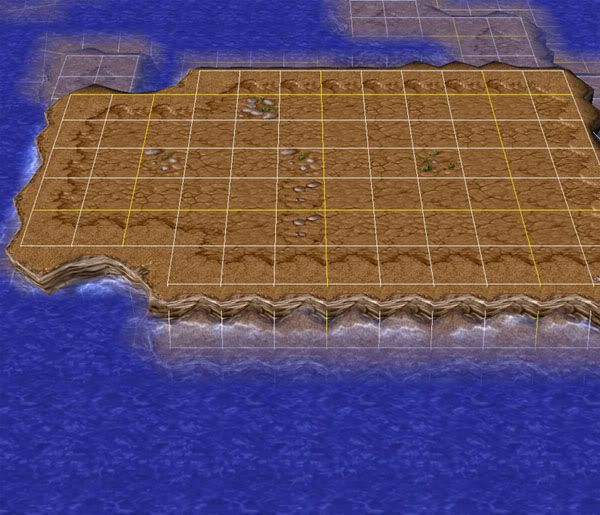
Now you should see something like this. Not very flattering and rather bumpy. A quick solution to that is the „Smooth” tool. Use it to make your island not so hilly and bumpy. Work your way carefully around the edges, and try to give it a natural beach look.
Smoothened terrain
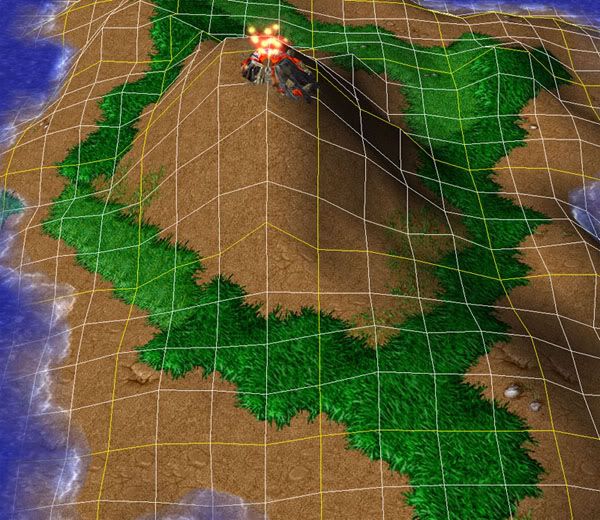
Step 3 – Adding the volcano base and roughness
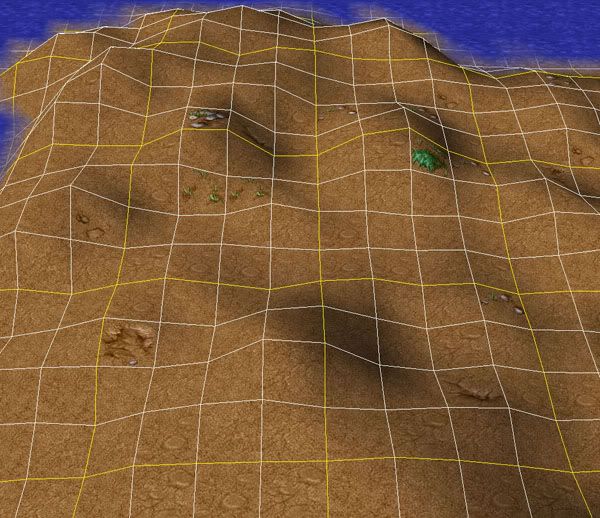
Now, use the raise tool again to make the volcano base. Raise the terrain quite much. Also, apply the tool to the other parts of the island as well to give it a controlled and natural bumpyness.
[B]Volcano Base
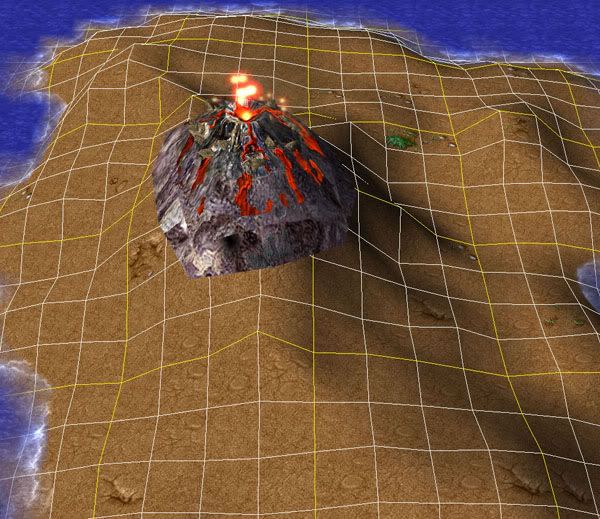
Step 4 – making the actual volcano
Now, open the Object Editor and select doodads. After then, find the torch model from props. Change its art – model file to Volcano <base>. Volcano model can be found under destructibles.
Note: This is because doodads height can be manipulated and the torch has a small collision size. It is also unselectable. (Original volcano's collision size is changeable, but its a destructible so its height cannot be manipulated easily)
Then go back to WE, and select it. Place the volcano on top of the volcano base, which you made earlier. Then hold down ctrl+page down to lower the volcano into the base.
Placed Volcano
Lowered Volcano
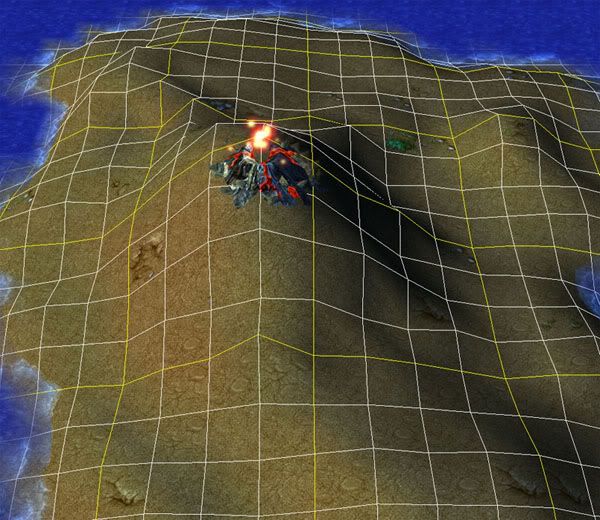
After that, pick „Raise” tool again, and raise the top edges of the volcano.
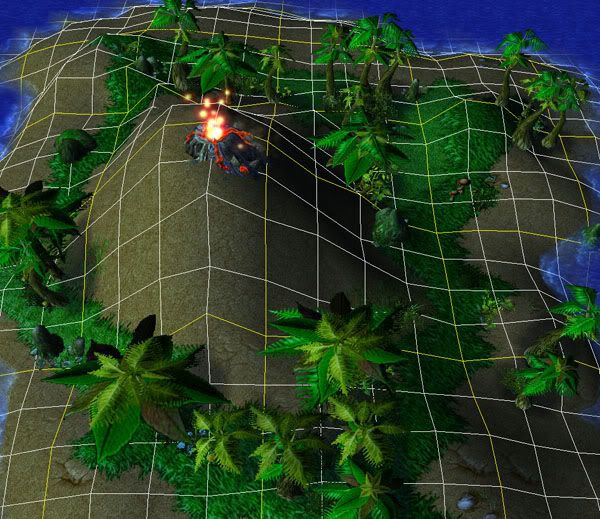
Step 5 – Adding landscape
Start adding grass, because do you want a dull looking dirt all over the map? Of course not. Hint, grass usually doesn’t grow on the top of the volcano.
Step 6 – Adding some enviroment
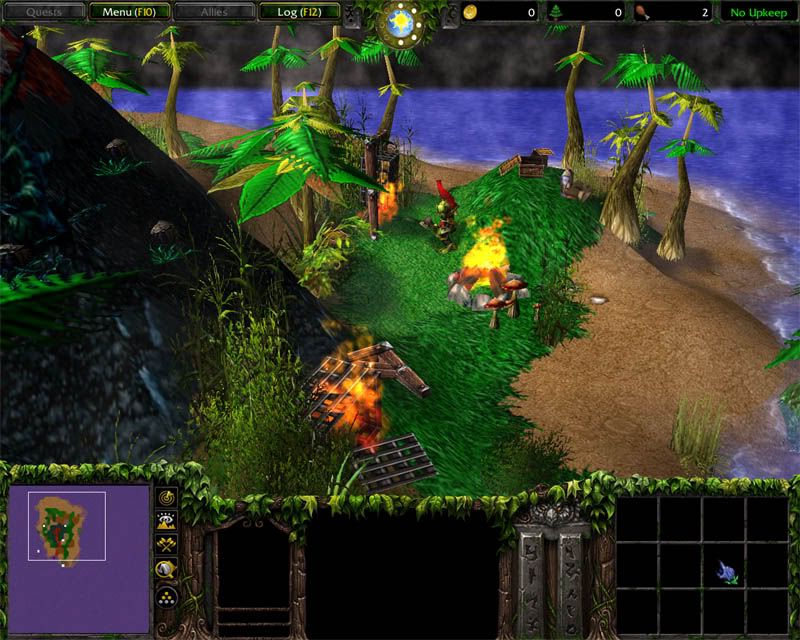
First I add some big trees around the volcano, then the little ones, after that I use enviroment doodads to give to forest more jungle like appearance. Don’t place trees very randomly, place doodads and trees where they look natural. Also, try placing rocks and shrubs on the shoreline to get that wild nature look.
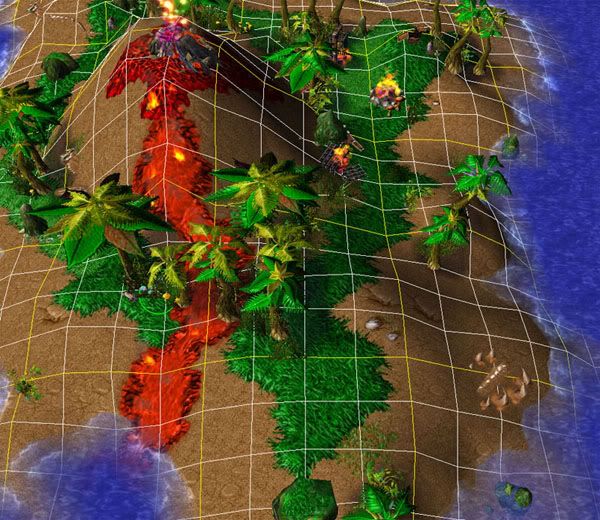
Note: Adding dead (looking) trees around the lava instead of normal trees gives an better effect. Look below to see how to import lava tiles.
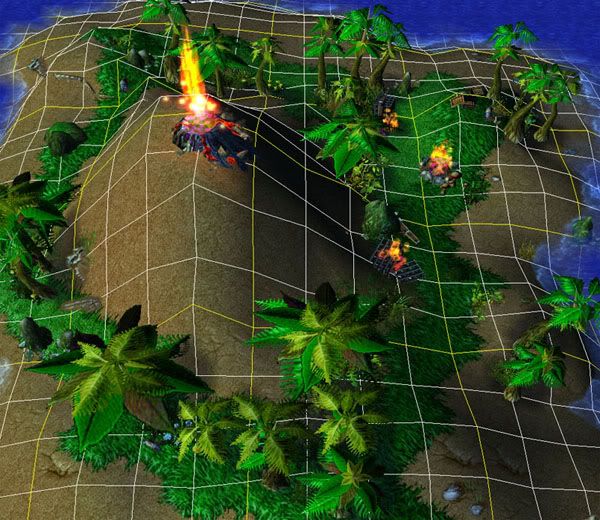
Step 7 – Final touch
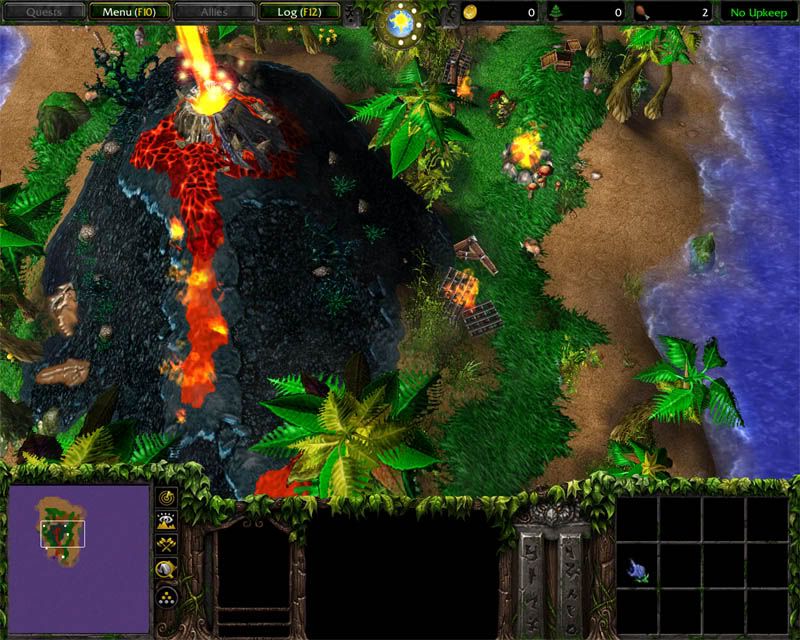
For final touch, I added trashed cages, skull piles and some corpses to make the feel that some natives have been living there. Also, I added bats to the top of the volcano, and some birds around the island itself. For finish, I add the fire (cinematic) to the volcano top.
Step 8 - Extra
As some users mentioned, the atmosphere looks cheerful. Its time to cast voodoo and enchant the terrain a little bit.
First, we need to add new custom tiles. Select Andvanced> Modify tilesets. Check the option "use custom tilesets". Then add some lava tiles to your existing tiles. I use lava and lava cracks from dungeon tileset.
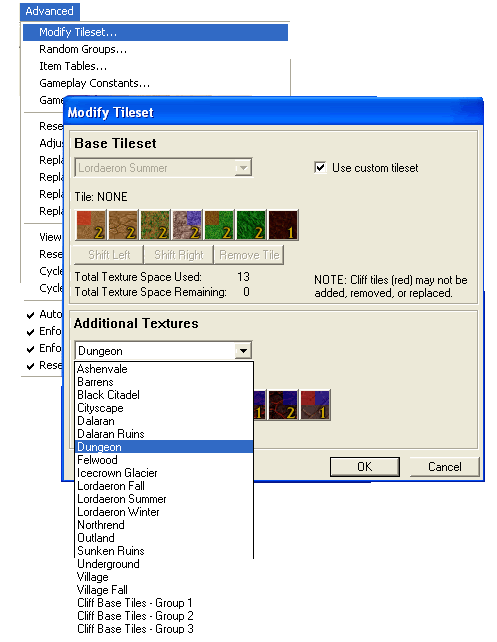
The only place where we need lava tiles, is the top of the volcano. Add lava cracks tileset to the top of the mountain and use lava tileset to make a stream of lava from the volcano to the water.
To make your lava on fire, open your doodaas and locate brazier, its under props. Then place the braziers on the lava strip. Finally select them all and sunk them underground, so that only the flame top’s are seeable.
Note: You can use fire (small) from cinematics, to even more enchant the lava. Dont forget to lower it using ctrl+page down keys.
Placed braziers

Lowered braziers
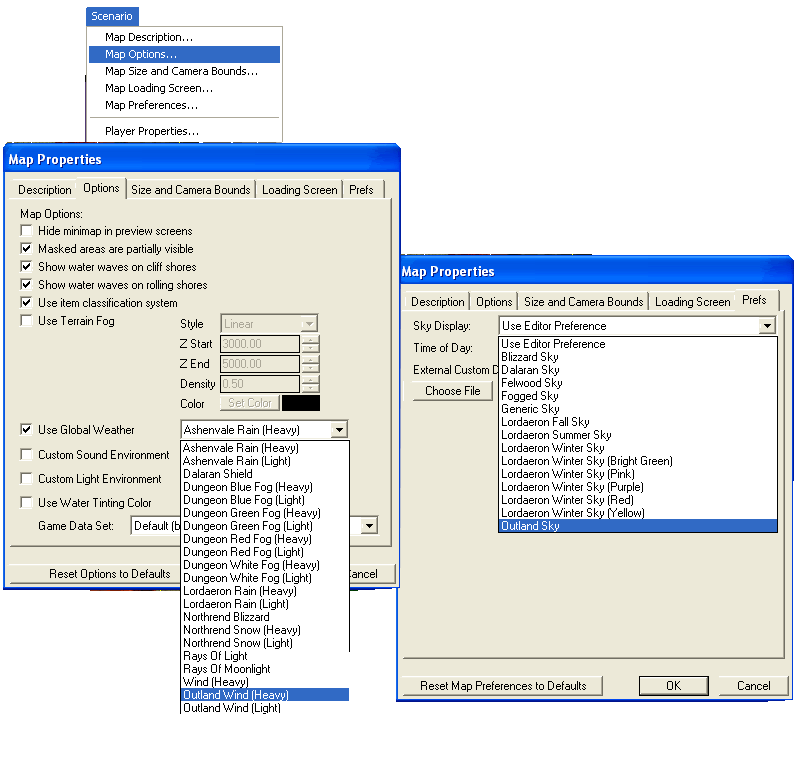
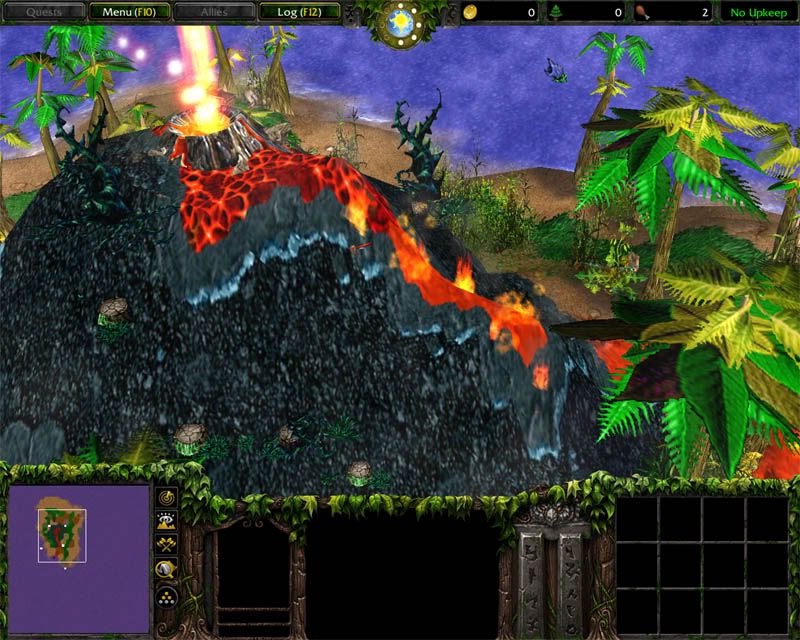
For the last nip/tuck, im going to change the environment effects and current sky.
Open scenario>map options and change the Global weather to “Outland wind (heavy)”. And change the sky to felwood.
And to really finish off the volcano, cover it with rough dirt from Icecrown Glacier landscape. Also try applying sand from Sunken Ruins tileset to the shores.
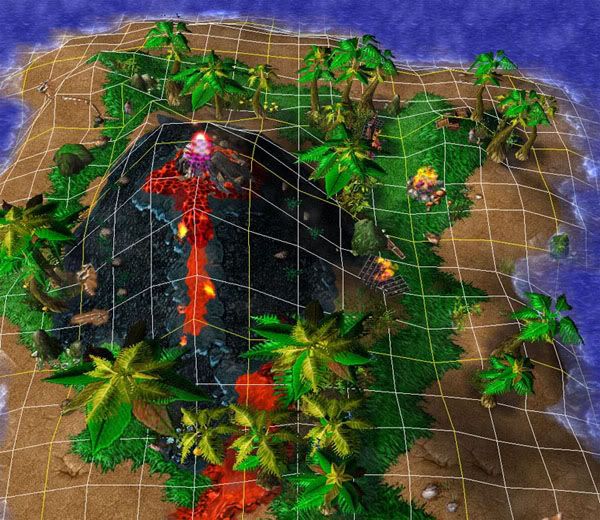
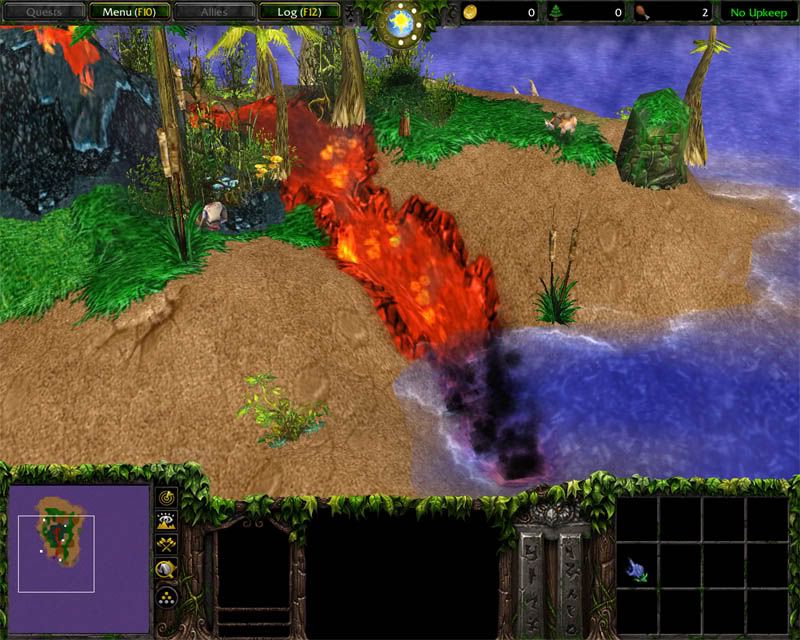
In game Screenshots
Note: Remember, you can test and play with all the options I mentioned to give the isnalnd even a better look.
This is my first terrain tutorial, any feedback and criticism welcomed. ;)
Click here to comment on this tutorial.
|
|
 |
|
 |
Designed by Arkheno
2005
Blizzard
Entertainment®
Blizzard Entertainment is a trademark or registered trademark of Blizzard
Entertainment, Inc. in the U.S. and/or other countries. All rights
reserved. |
|