|
|
 |
| |
Skins - Editing Skins with Photoshop
Tutorial By corvusHaunt
Versions:
Part 1 - Editing Skins with Photoshop
Part 2 - The Method
Editing Skins with Photoshop
This tutorial will teach you the basics of editing skins using Photoshop, and how to use them inside the World Editor.
Materials:
-An MPQ viewer and extractor
-A BLP to TGA converter
(Warcraft 3 Viewer and WC3 Image Extractor II have both these functions)
-Photoshop
Extracting the Skin
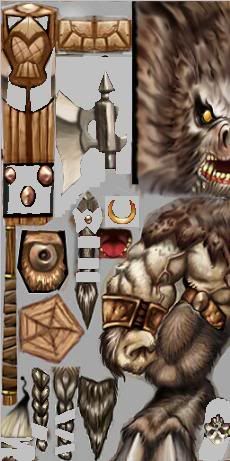
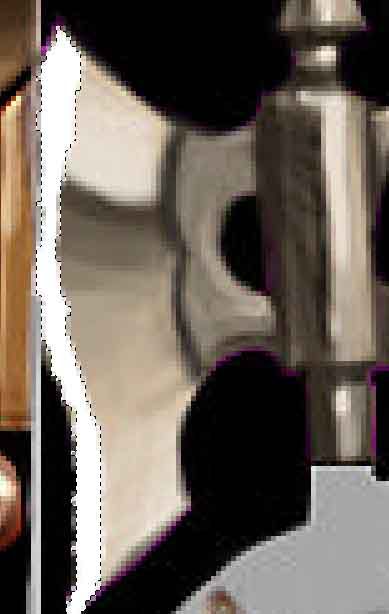
First, of course, you need to extract the .blp file, do you can edit it. With whatever tool you are using, extract the "HeroTaurenChieftain" skin. Now, if your tool doesn't do this automatically, convert the .blp into a .tga (targa) file. The skin should look like this:
Editing the Skin
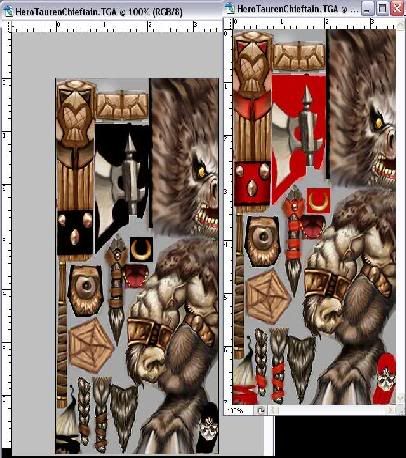
Now that you have extracted and converted your skin, open the .tga in Photoshop.
(Note: Notice those black areas covering some parts of the skin? Those are parts of Team Color, that you can see if you turn on the "Alpha 1" channel. You can learn more about editing Team Color with Orc_Tamer's Tutorial )
Team Colors and the Alpha Channel:[/I]
Now we can start editing our skin any way we like. I started with only two simple and noticeable changes.
First, we will turn the Tauren's leg orange.
What you need to do is use the Lasso Tool to outline the Tauren's leg:
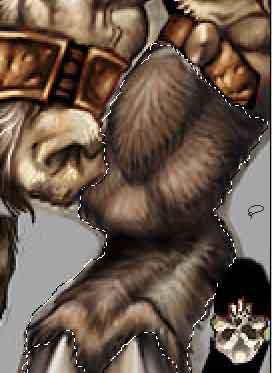
This is so we only make changes to that one particular section of the skin.
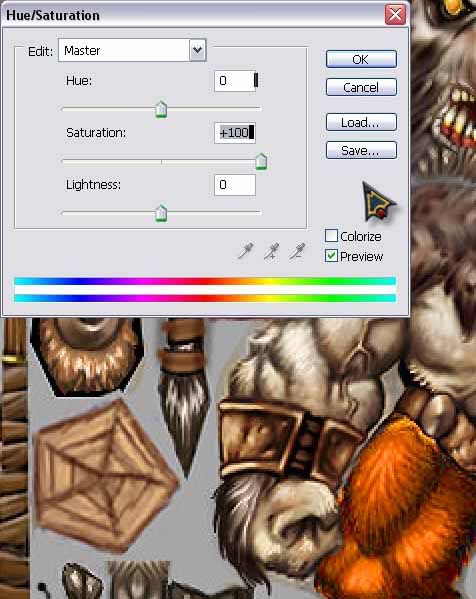
Instead of just painting orange over this area, we can change the Saturation, so we don't lose the hair look.
So once you have the Tauren's leg sectioned off, go to Image >> Adjustments >> Hue/Saturation, or you can use the Hotkey Ctrl+U.
Change the Saturation to +100. This will change the tint of the area to orange, and not ruin the hairy texture of the leg.
(Note: Are you wondering why you can only see half the Tauren's body? This is to save space. Since both sides of the Tauren are the same, the skin just wraps around the model from both directions. Although this saves space, unfortunately this means you can not have two seperats patterns on both sides)
After the leg is made orange, we can now move on to another small change. To make the Tauren look like he just came out of battle, we can add blood to his axe.
Once again, use the Lasso Tool to section off the edge of the axe. You can use a red brush, or a white brush and apply a color overlay.
The Axe:
As you can see, I didn't totally section it off perfectly. If this happens to you, deselect the area and use both the brush and the eraser to make it look neater. Just don't spend lot's of time on extremely small details, because you will be dissapointed when you can't see them in-game.
You can change more of the skin, but for this tutorial, those two things are the only changes I made. Now it is time to save and convert back to blp.
(Note: You must save the skin as a Targa file, because bmp and jpg do not hold Alpha channels. If you save it as jpg or bmp and convert it, the blp file will be empty)
Importing into the World Editor
Now is finally the time you get to see your skin on the model :)
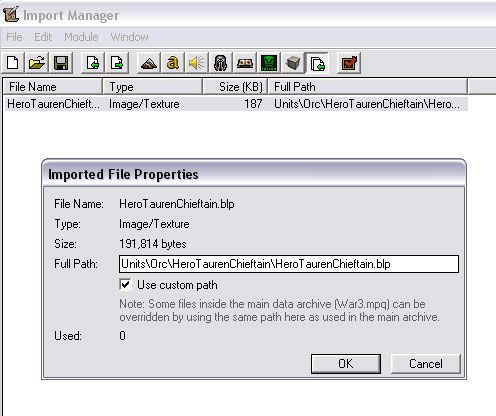
Open up a new or existing map and open the Import Manager. Select Import File and open your new skin.
As of now, your skin won't do anything. You must change the path of the skin so the Import Manager knows where to put it.
Go back to your Extracting tool you used to extract the skin. It should show you the path that it was assigned. Change the path inside the Import Manager to the correct one. Here, we used the Tauren Chieftain Hero skin, which uses the path "Units\Orc\HeroTaurenChieftain\HeroTaurenChieftain.blp"
(Note: You can learn more about Importing Skins with Archian's Tutorial)
Seeing the Skin
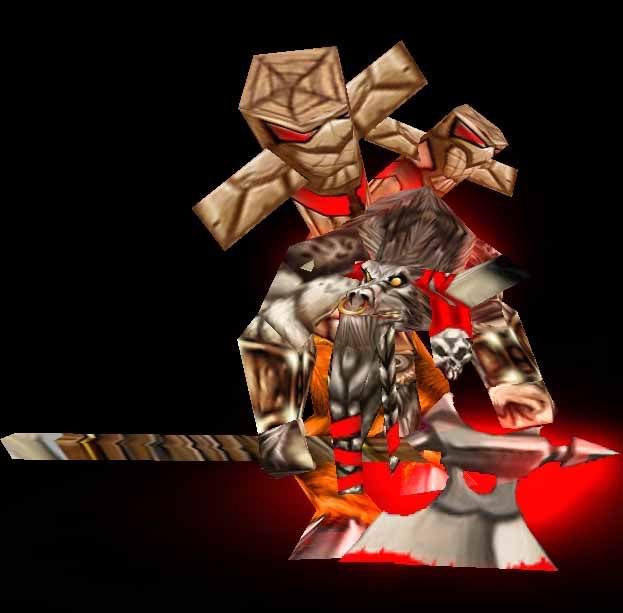
Once you have imported and corrected the path, save and exit the World Editor. Once it closes, reopen it. Now, when you place a Tauren Chieftain on the map, you will see that his legs are orange, and his axe has blood on it!
I hope this tutorial helped you, and that you can now create new and more creative skins to further customize your map :D
Also, if you don't mind, I would like to see any skins that this tutorial helped/inspired you to make. That would make me very happy :)
Side Note: I will not be here for a week starting in half an hour (10:00, 23 June, Eastern Time), so comments are still welcome, but I will not be able to make changes for awhile. Thanks :)
Click here to comment on this tutorial.
|
|
 |
|
 |
Designed by Arkheno
2005
Blizzard
Entertainment®
Blizzard Entertainment is a trademark or registered trademark of Blizzard
Entertainment, Inc. in the U.S. and/or other countries. All rights
reserved. |
|