|
|
 |
| |
Icons - Editing with a Wc3 Feel
Tutorial By Whitesock
Editing Icons With a Wc3 Feel
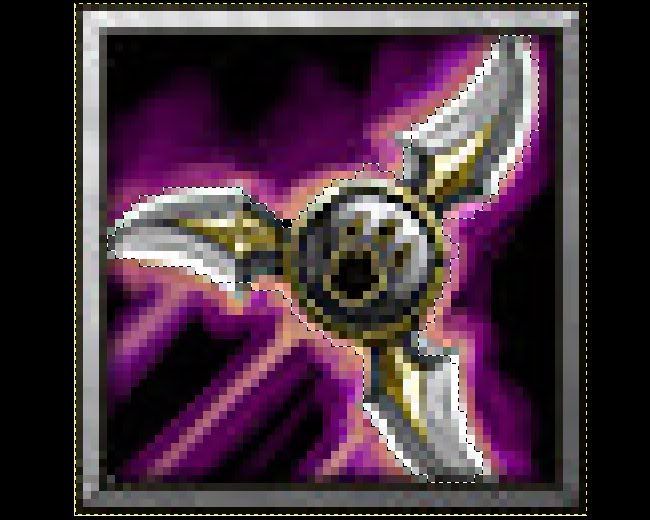
This tutorial will help you come up with icons like this...

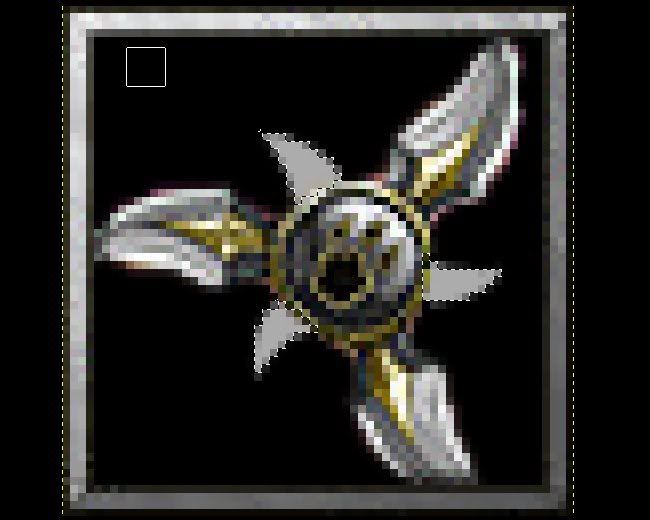
...and this.

Note- Making icons at this level will take practice. Start easy and then start getting more advanced. Remember to do many tutorials too.
Also, this was made mainly for the GIMP, but can probably done in photoshop too (the GIMP download is at the bottom of the tutorial in the Resources section.
Ok, lets get started!
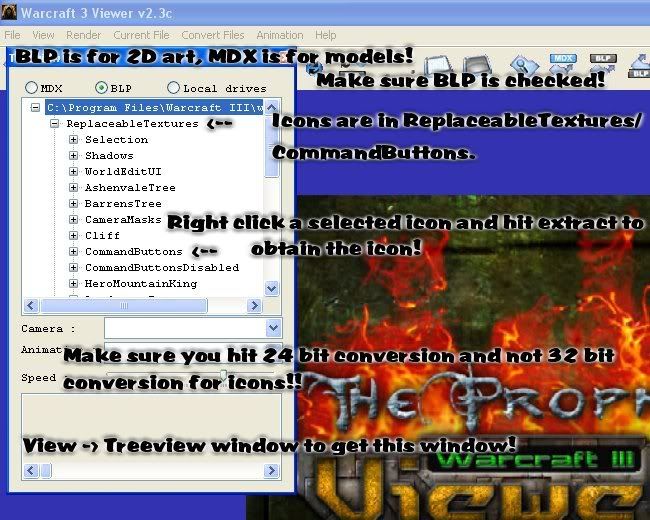
Extracting Icons
To do this I recommend you use an image extracter. I reccomend Warcraft 3 Viewer. It's what I use. :)
This picture should give you a quick explanation on what you need to do in it.
REMEMBER TO CLICK 24 BIT OR THE ICON WILL BE GREEN IN-GAME
Editing Icons
This is going to be a BTN for the first part. A BTN is a basic icon with a border. No biggie yet. :)
Step1- Get an Icon if your going to edit it (like me) or you can start from scratch on a 64x64 canvas.

Step2- Figure out what you want to do. This is either the easiest or hardest step. Add a transparent layer over it (Layers are kind of like pages over a page that is a certain color. A transparent one is like you having a clear transparency and a marker. It makes it so if you make a mistake you can easily erase it and not bother other parts. To make one, go to Dialogue->Layers, channels, and paths. Then click the single page at the bottom left of it).
Step3- Outline additions or recolorings or the same color in a selection. This way we can save the selection and fill it with a color easier. (Use the paths too or the freehand selection tool. It should be a lasso).
Helpful Hint!- Zoom in! I usually do a 800x zoom!
Step4- Fill in the selected color (Edit->Fill (This will fill with the foreground color))
Step5- Now the fun part! Use the airbrush with either both colors white of both colors black. Fill in the shadows with black and the highlights with white (Set the colors (foreground and backround) with the window called The GIMP or just go to Tools->Toolbox).
Helpful Hint!- Use a lower opacity on a larger brush and a higher opacity on a smaller brush
Note- This might not always work, like in this icon. If in doubt, ALWAYS use the style that is in the icon before you changed it.
Step6- Try to add something in the backround. I usually use black and then add on over it. This really depends on the style of the icon though.
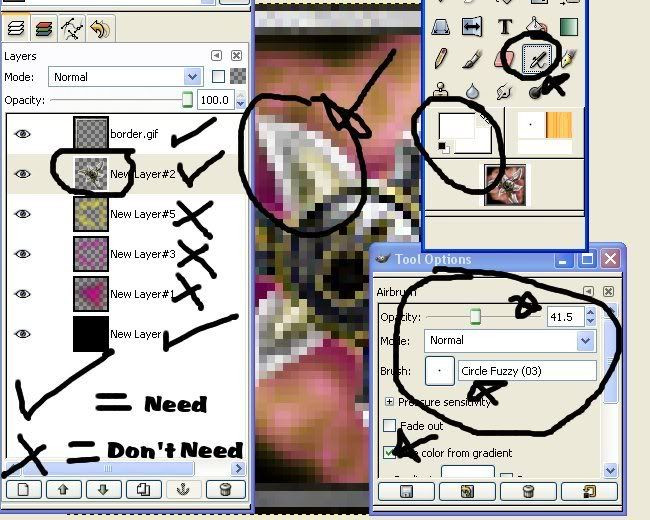
Explanation- The dialog (window) on the left is the layers dialog. Remember it? Good. :P
-I made layers for each part of the backround. I also merged down the glaive. That's why it's circled. It's the main part of my image.
-The tool options dialog shows the airbrushe's opacity (transparency-ness), the size (circle fuzzy 3), and that I'm using the color from my gradient (the foreground and backround colors)
-The two white colors that are circled are the foreground and backround colors. Those can be changed by clicking them and selecting a color on the window that comes up.
-The stick like thing that's circled on our toolbox is the airbrush tool. Our weapon of choice. :)
Finished product?- Remember to convert to a .blp and you done, unless...
PART 2- DISBTN's (Disabled Icons)
Step1- Get an icon. Add a transparent layer over it.
Step2- Black out the entire border. If there is no black next to the border then make another layer over it and fill it with a 5pixel line on the outsides. Gaussian blur it (Filters->Blur->Gaussian Blur) by about 10pixels.
Step3- Another layer over that. Fill it completely with black. Set the layer's opacity to 50% (It's in the layers dialouge; towards the top).
Step4- Save it as DISBTN so you can distinguish it from the BTN's.
Note- a PASBTN (Passive icon) is without the third complete black layer.


^Final Product^
Resources
Helpful links for things that I used making this tutorial that might make you go, "How did he do that? :confused: ".
Tutorials page.
Tips and Tricks page.
Download the GIMP here.
http://www.gimp.org
Tutorials on the GIMP.
http://www.gimp.org/tutorials/
http://gug.sunsite.dk/?page=tutorials
http://www.gimptalk.com/
Warcraft 3 Viewer
http://www.wc3sear.ch/?p=Tools&ID=11
Icon Border (Attached Image#1) and PASBTN Icon Border (Attached Image#2)
Click here to comment on this tutorial.
|
|
 |
|
 |
Designed by Arkheno
2005
Blizzard
Entertainment®
Blizzard Entertainment is a trademark or registered trademark of Blizzard
Entertainment, Inc. in the U.S. and/or other countries. All rights
reserved. |
|