|
|
 |
| |
Terraining - Small Island
Tutorial By Murkatal
Murkatals Guide to Terraining an Island Revised
Purpose of Tutorial
I wanted to share my abilities in terraining with the general public, since me and some of my friends think I am good at it. This Tutorial will lead you through a basic "Murloc" village, but these basics can be used in any island based map.
Table OF Contents
1. Starting the map
2. Terrains
3. Doodads, Critters, Monsters etc.
4. Weather and Sky
1. Starting the map
You should start off all maps made in Sunken Ruins in Sand ground texture and shallow water.The shallow water helps form islands, and if necessary you can add deeper water later. Start off by using the Raise tool in the Terrain Pallete to create a hump of dry land.
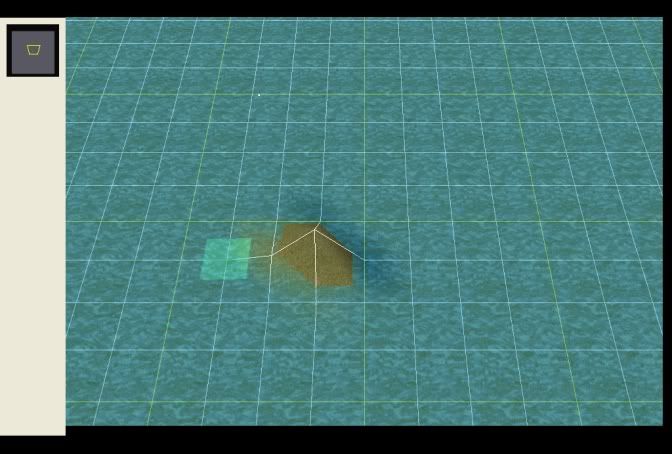
Next use the Platuea tool to spread the raised land around, creating a small island.
Now this land looks a bit unnatural doesn't it? No island I have heard of is raised at the edges all around. To fix this take the "smooth" tool, and run it along the edges of the island until they are flat and look pretty natural.
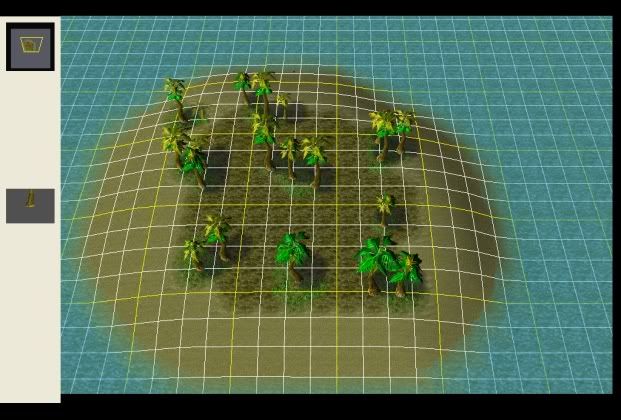
This is what I have so far:
2. Terrains
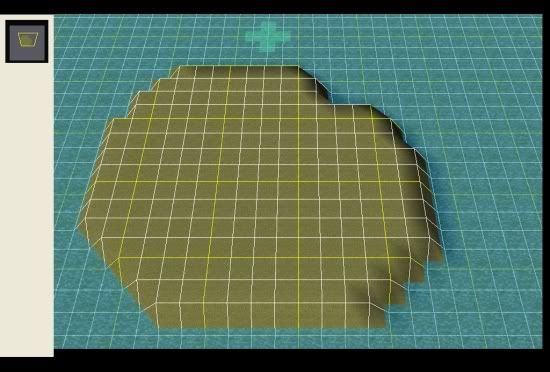
By now you should have a small circular island sitting in front of you. Now it looks kind of dull doesn't it? Thats because no island is completly sand!
I start off with the "rough dirt" terrain because no island has sand holding up the entire thing. Now make a large circle of "rough dirt" on the center of the island, and don't worry it won't be there forever.
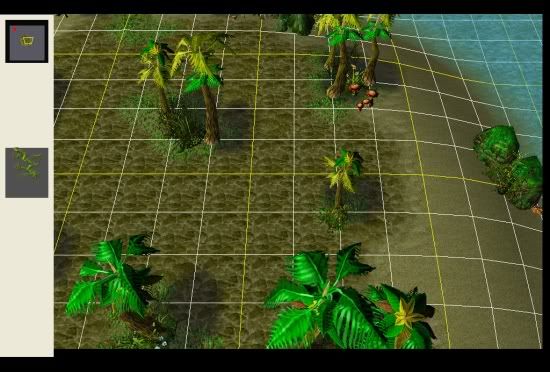
Trees don't usually sprout up from dirt, so I take the "grassy dirt" and make some scattered patches of it on the island. I recommend using the smallest paint brush for this so u don't cover up all the "rough dirt"

This is What a finished terrained map may look like, but this is no where near done yet.
Now I don't tend to use alot of the terrains for sunken ruins, because I don't think many of them are good.
3. Doodads, Critters, Monsters etc.
Here's the fun creative part I insist you use my island as a guideline because this can be done in many different ways. I usually start off with trees. Go to the Doodad Pallete a pick "Ruins tree wall" remember that grassy dirt stuff? thats where our trees are going to go. Put about 2-3 trees on each patch depending on how big the patch is, but fear not trees will come in handy later.
Next would be small and large rubble, rocks, shrubs, mushrooms, and flowers.
I start with the "Rubble" loccated in the enviroment section of Doodads. place rubble along the farthest (north) end of the island, and some around the most northern sides. Then place shrubs and mushrooms from the enviroment pallette in between the "rubble". Personnaly I like to delete some of the northern trees so i can add more rubble.
This is what I have so far:
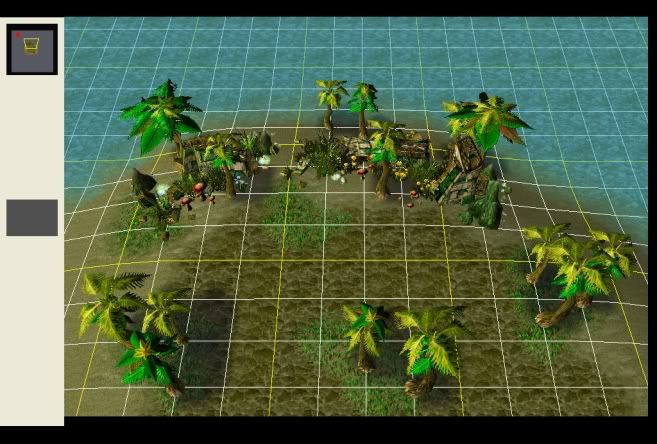
I put canopy trees in rubble to create i sort of shaded area for critters to rest, and shells to make it look like shells got caught in between rocks during high tide. Also I tend to add alot of shrub on top of each other because it makes the shrub look more grown.
Next would be more shrubs and flowers. :eek: I know its kinda dull but be patient it will look way better.
Take up your Enviroment palette, and prepare. The next thing we will focus on would be making the shores and trees look better. i tend to put 2-3 shrubs around trees, spread out or close however you prefer, and maybe a flower or two on a couple. Also I put the "Rocks" from the Enviroment Palette around the shore, place 1-2 shrubs near them, and 1 shell at most. putting rocks close together and putting shrubs in the gap is a really cool way to get foilage around shoreline.
After adding that on I ended up wth this:
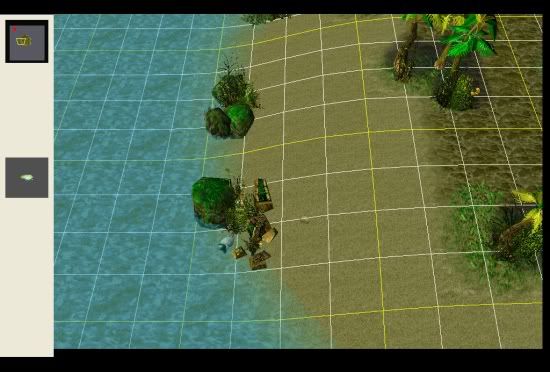
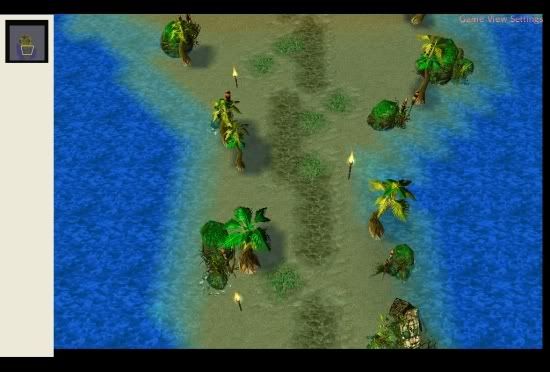
Now the northern section of the map has gotten alot of attention so lets make the southern section pretty. First you want to raise the ground near the southern end of the island a tiny bit, so you get this effect.
Now that you have a little water "walkway" place rocks along the sides, trees, and even deeper water.
I ended up with this kind of walkway:
The last thing I add are the living things, and finishing touches.
First off I go to the Unit Palette, and go down to neutral passive as the player, then neutral as the unit type, then chose Sunken Ruins. Down under Special the first 2 icons are Murloc Hut 0 and 1. Murloc Hut 0 is smaller, and Murloc Hut 1 is taller. I put two Murloc Huts 0 on the left and one on the right. Then I put one Murloc Hut 1 near the north of the island towards the front of the rubble. next going back to the Doodad pallete, take the barrels from the Destructables/trees section and put them around the Murloc Huts. Now, go under Dungeon>Props>fish dead. These look great near the huts, and the barrels, they are like food for Murlocs.
This is What I have so far:
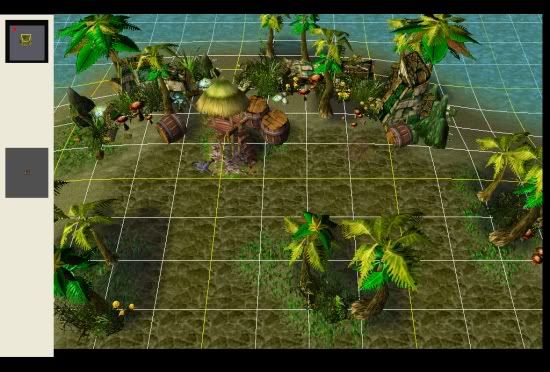
Now the buildings look kinda out in the open don't they? Well to fix that try putting shrubs around it and/or some trees.
Now if I was just making a fancy island for a campaign or scenario then I would be done, but there are ways to spruce the place up.
4. Weather and sky
I don't have alot to say on the matter, Just that a sky looks good, maybe the generic one, it all depends on the mapmakers mood. You can change the water color under Map Options down near the bottom it says use water tinting color chose custom and put in numbers for the amount of color. Also fog or rain is a good way to make the Island more tropical.
5. Special/ Semi-Advanced Section
This Section is mainly for people who would like to make cinamatics from Island Scenes or any other reason. I will talk about the object editor in this section, so if you on't know what I am talking about, check other tutorials, or ask around.
5.a. Using the Object Editor to better your maps
I always thought the ground texture for the Murloc Hut was ugly, Murlocs don't build on stone! So to fix that I made some custom Murloc Huts, and I set the Ground Texture to none. Also later I will talk about Critter Murlocs, to make these take a Murloc,(prefered is the Slave one from the Naga race) give it the abilities Locust, and Wander (optional) andset their scaling value to about 5.0-6.0.
5.b. Placement of Units with Locust
Usually I put the tiny Murlocs around shrubs and their huts, guarding their fish, but again its all up to you.
5.c. Ideas and Tips
I have said all I could about the Islands, so I will leave you with tips, ideas, and some of my own screenshots of finished work.
Tips
1.Shrubs can be a great thing to cover up really barren pieces of land.
2.Think of the time of day, If its a sunny noon maybe the murloc hang out in the reefs, and at night they plan Raids around a torch.:eek:
3. Try making critters from other creeps. I made a water lizard by downsizing a Snap Dragon, and it looked good.
4.good locust monsters:
Murlocs(all different kinds)
Snap Dragon
Dragon Turtle (or any really)
Will o' the Wisp (idea from the Terraining Darker Scenery thread)
make by making a peon with locust and wander, and make model art the Parasite missile.
Shorecrabs
Makuras
and the list goes on.
My own Ideas:

I hope you can make better Islands From now on and thanks for reading
-Murkatal
(fixing the giant Images and making them smaller)
Click here to comment on this tutorial.
|
|
 |
|
 |
Designed by Arkheno
2005
Blizzard
Entertainment®
Blizzard Entertainment is a trademark or registered trademark of Blizzard
Entertainment, Inc. in the U.S. and/or other countries. All rights
reserved. |
|